
It's Beets!


Who doesn't love beets? Really.....Let's be completely honest.  From lowering cholesterol to possessing anti-aging qualities, this amazing earthy item is a good source of protein & fiber too. The root & leaves prevent coronary artery disease & stroke. Plus, your getting vitamins A, C, E, K, & B6!!! Can it get any better?  Yes it does! Beets are cancer cell fighters! Hip, hip, hooray for beets! So..... I thought I'd tell you about two wonderful recipes that will allow us to use every part of this super veggie. I owe great thanks to my amazing sister for the pickled beets recipe & our mom for getting us hooked!

Pickled Beets
Beets are usually sold 3 per pack.
Buy the smaller beets, because the really large ones have more of an earthy flavor. 
(That's big sis information:))
Wash them thoroughly and cut off the stems leaving a couple inches.
Also, do not cut the end of the roots.
Place them in corning ware with one inch of water and cover with foil.
(You could use your glass lid, but I like the foil because it allows a little steam to escape.)


Cook for about 2 hours at 350.


Your beets should be soft, but not so soft that they fall apart.
(Pierce with a fork if your unsure.)
Get them out of the juice and onto a regular plate.
Let them cool to room temperature for about an hour before peeling.
Don't forget to enjoy your beautiful, pink fingers:)
(P.S. If you make this when you color your eggs, save the dye!
It makes a beautiful deep rose.)
Slice them about 1/4 of an inch and place in a bowl.


Add fresh parsley, salt, olive oil, and crushed garlic to your liking.
Last, add 1-2 teaspoons of vinegar.
Lightly, toss and coat your beets.
They can stay fresh in your fridge for up to three weeks.
Don't forget to seal it with a lid or everything will smell like
pickled beets!

I love my beets on toast for a light lunch!

And next......


Beet Greens
Take your beet greens and cut them into 2inch pieces. Let them soak in cold water while you do the next steps.


Cut up 2-3 strips of bacon. Place in a non-stick skillet and cook until lightly brown.
(Don't feel guilty about the bacon grease.....remember that it will be balanced out with the
cholesterol fighting leaves:))
Add 1/2 a chopped onion.....
When the onions are softened and they start to brown, add 1 minced garlic clove, (or more if you like).

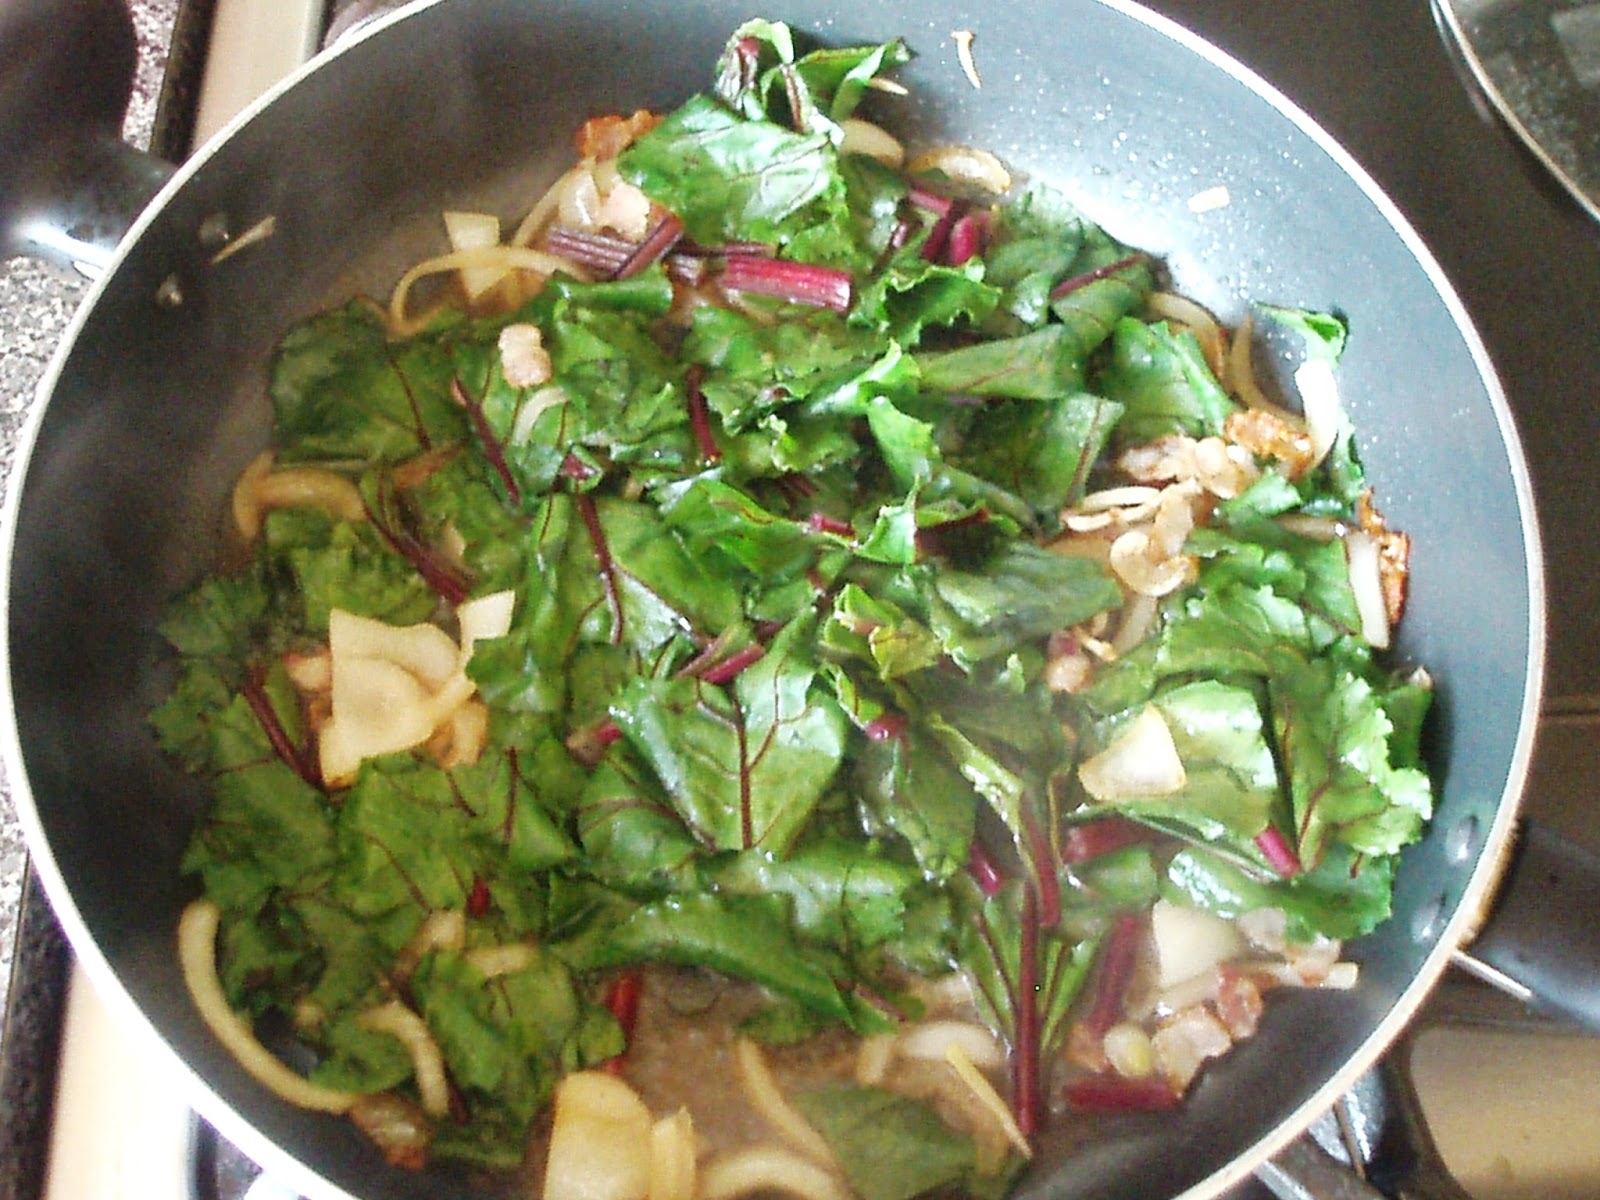
Add half a cup water and 1 Tbsp of sugar.
When it's boiling, add your beet greens, reduce your heat and cover.
It may take 7-14 minutes for you greens to tenderize, so pay close attention. 
And last......add your cider vinegar, (3 Tbsp), if you really like the pickled flavor.
This makes a great side dish!

Hope you try & enjoy!


Comments

  1. I love beets and make a pretty good Russian brosche. I am going to try your easy recipes soon to change things up!

    ReplyDelete
    Replies
    1. Sounds deelish! Let me know what you think:)

      Delete

Post a Comment

Popular posts from this blog

Crystal Knob Rack

So... what can you do with a piece of wood measuring 45 inches by 3 1/2? Well, if it's 1 inch thick, you can use it to make the cutest wall rack. But instead of using hooks, use drawer knobs!   Here's how the idea got started. I needed a place to photograph kids aprons. Now, most of you know that my girls have been modeling them, but they can't model toddler aprons, right? All I could picture was a gorgeous crystal knob rack used to display those mini aprons I love to make. And after searching in stores and online, I realized they are not very easy to find. Soo...... "oooohhh hubby.... can you drill a few holes in this piece of oak wood I found in the barn?"   Of course he did it in a heart beat & he even sanded it down too! The holes were positioned like this: I did the two outer ones first, then measured to the center in between those. And again, the middle of the center and outer one. Got it? I took some regular creamy white wall paint I had left

The Ogden Cami ~ A Review

Hello friends! I hope you all had a wonderful February and a great start to March! Spring is right around the corner and I'm counting down to daylight savings on March 10th! Hooray for longer sunshine! Lately, I've been longing to go back to stitching up clothes. And... I ended up finding the cutest pattern to get me back in the groove at Hawthorne Threads . The Ogden Cami by True Bias Patterns is perfect and quite simple! I started off by making a test run with some red, light-weight fabric, figuring if this comes out good, I'll have 2 tops! And guess what? It came out awesome! Making a practice piece was a great idea. It's always recommended and there are so many reasons why. In the instructional booklet, I wrote myself little notes.  ~ cut the fabric 1/4" larger at the sides so I can use a serger. This will allow me to have finished ends and still a good seam allowance.  ~ cut the straps 1/2" larger, so the

January.... you're almost done!

Hello friends!  I feel like it's been forever since my last post. I suppose some might even say I've been spending nearly all my time on the forefront of creative madness along with trying to continue healing. Holy smokes! Chemo and radiation will change a person forever. I'm continuing my healing journey, and staying hopeful that I'll remain in the 'clear' for a long time. It's odd, the way you feel, when everything you've gotten accustomed to: the running around, working day to day, rushing here and rushing there.... how quickly it changes when it's no longer a necessity. Yes, I am extremely thankful that my spouse supports and pushes for my healing time, omitting nurse life as it was, but like I told my girlfriend the other day, "how many craft projects can a girl possibly do?" ..... Well let me just tell you..... A LOT! Today's post will revisit some Instagram pics, (in case you don't follow along) with some of my most recent