Oh for the love of the needle and thread...... And just in time for Christmas!


Originally, I wanted a block that would repeat multiple times. But after playing around with colors, layout and more fabrics, I realized the potential for something more mesmerizing was happening. Slowly an awesome quilt pattern was taking place before my eyes.
What's even greater? You can make one too!
Believe it or not,


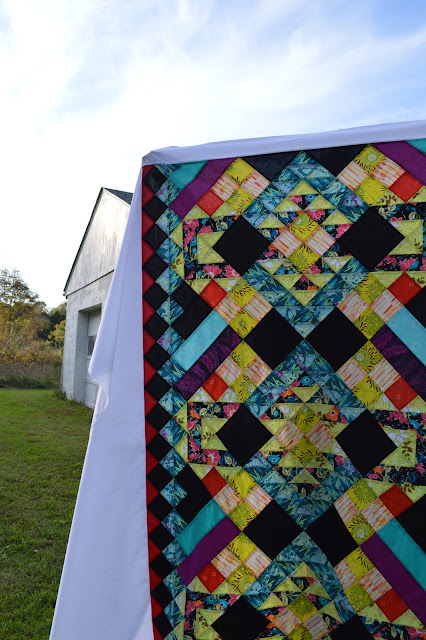
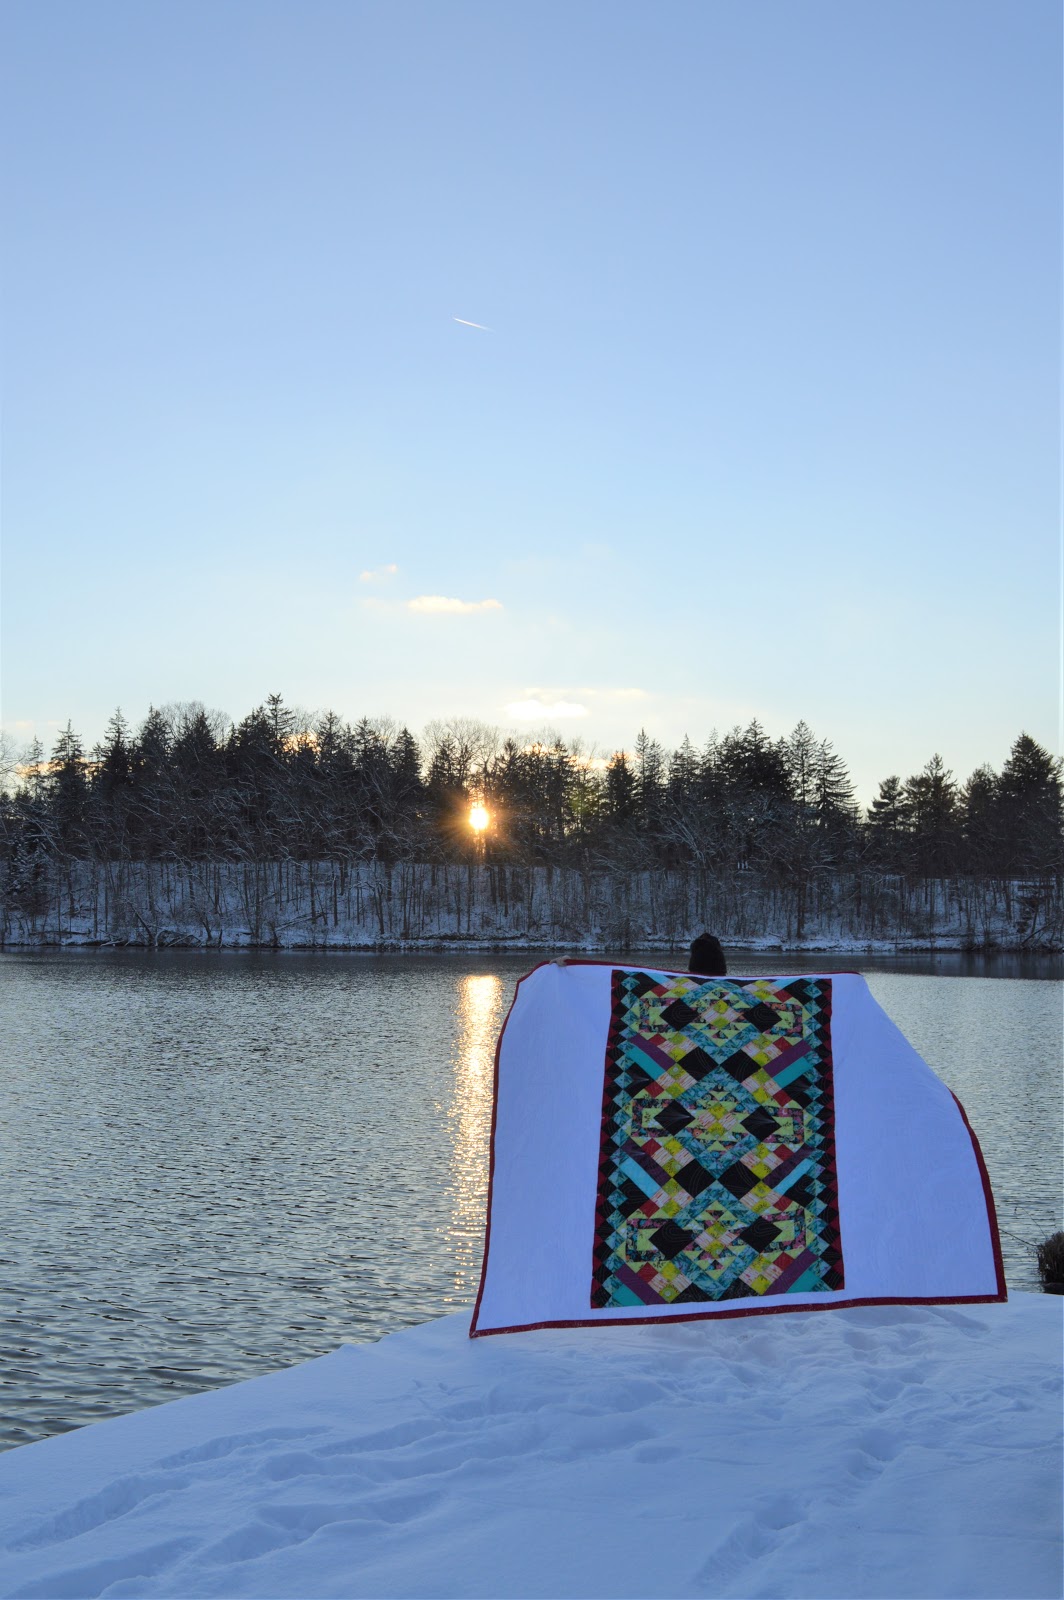
Look at these colors! I'm so ecstatic to share with all of you my latest quilt!

What's even greater? You can make one too!
So, I'm going to try real hard to break down the way this quilt was created, so that it flows for all of you the same way it did for me.
When you look at this quilt, there are a couple things that pop at first: the different shapes, colors, and contrasts that are taking place.
The focal point ~ those awesome three diamond blocks surrounded by simple rectangles. Should you decide to give this quilt a try, my most important recommendation is to pick your ooooomph ~ "contrasty" fabric choices for those 3 main blocks.


Let's get to measurements and cutting!
Starting from the outside and working inwards:
For the side (white) panels, you will need 3 yards of fabric.
From the 3 yards, cut 2 ~ 3 x 44 inch pieces. Set them aside.
These will be for the top and bottom of your quilt.
For the rest of the solid fabric, use the natural fold as a cutting guide. Cut the fabric into 2 pieces. These will become your side panels lengthwise.
Guess what? Half the quilt is cut out!
Guess what? Half the quilt is cut out!
For the red triangles, which really started off as squares, cut 38 - 3 inch squares.
For the black fabric, cut 42 - 3 inch squares,
(6 of them will be used to create the arrows on the sides.)
Also:
~cut 14- 5.5 inch squares
~cut 6- 3x5.5 rectangles
(6 of them will be used to create the arrows on the sides.)
Also:
~cut 14- 5.5 inch squares
~cut 6- 3x5.5 rectangles
Onto the half square triangles:
I love using Fat Quarter Shop's Triangles on a Roll for this part. It gets the job done super quick!
Pick 4 contrasting fabrics that you can pair up.
80 half square triangles of 2 fabric choices
and
84 half square triangles of another 2 fabric choices.
Pick 4 contrasting fabrics that you can pair up.
80 half square triangles of 2 fabric choices
and
84 half square triangles of another 2 fabric choices.
Using a 3rd set of fabric choices, cut 30 - 3 inch squares of each fabric.
Combine them to create 15 - 5 inch blocks like the one pictured below.

Combine them to create 15 - 5 inch blocks like the one pictured below.

Now time for fillers!
The goal is to create this piece below which will provide the slanted angles on each side of the quilt.

Using gradation fabrics would be pretty nice!
Here, you will need
12 - 3x3 squares (these are the bright red squares on my quilt)
8 - 3x8.5 rectangles
and
8 - 3x10 rectangles
~ Don't forget the black 3 inch squares and rectangles will be making up the arrows in this section!
Believe it or not,
time to lay out your quilt!
The easiest way is to line up the black and red blocks first.
Because everything is on an angle, sew this in sections like the pictures below.


The easiest way is to line up the black and red blocks first.
Because everything is on an angle, sew this in sections like the pictures below.


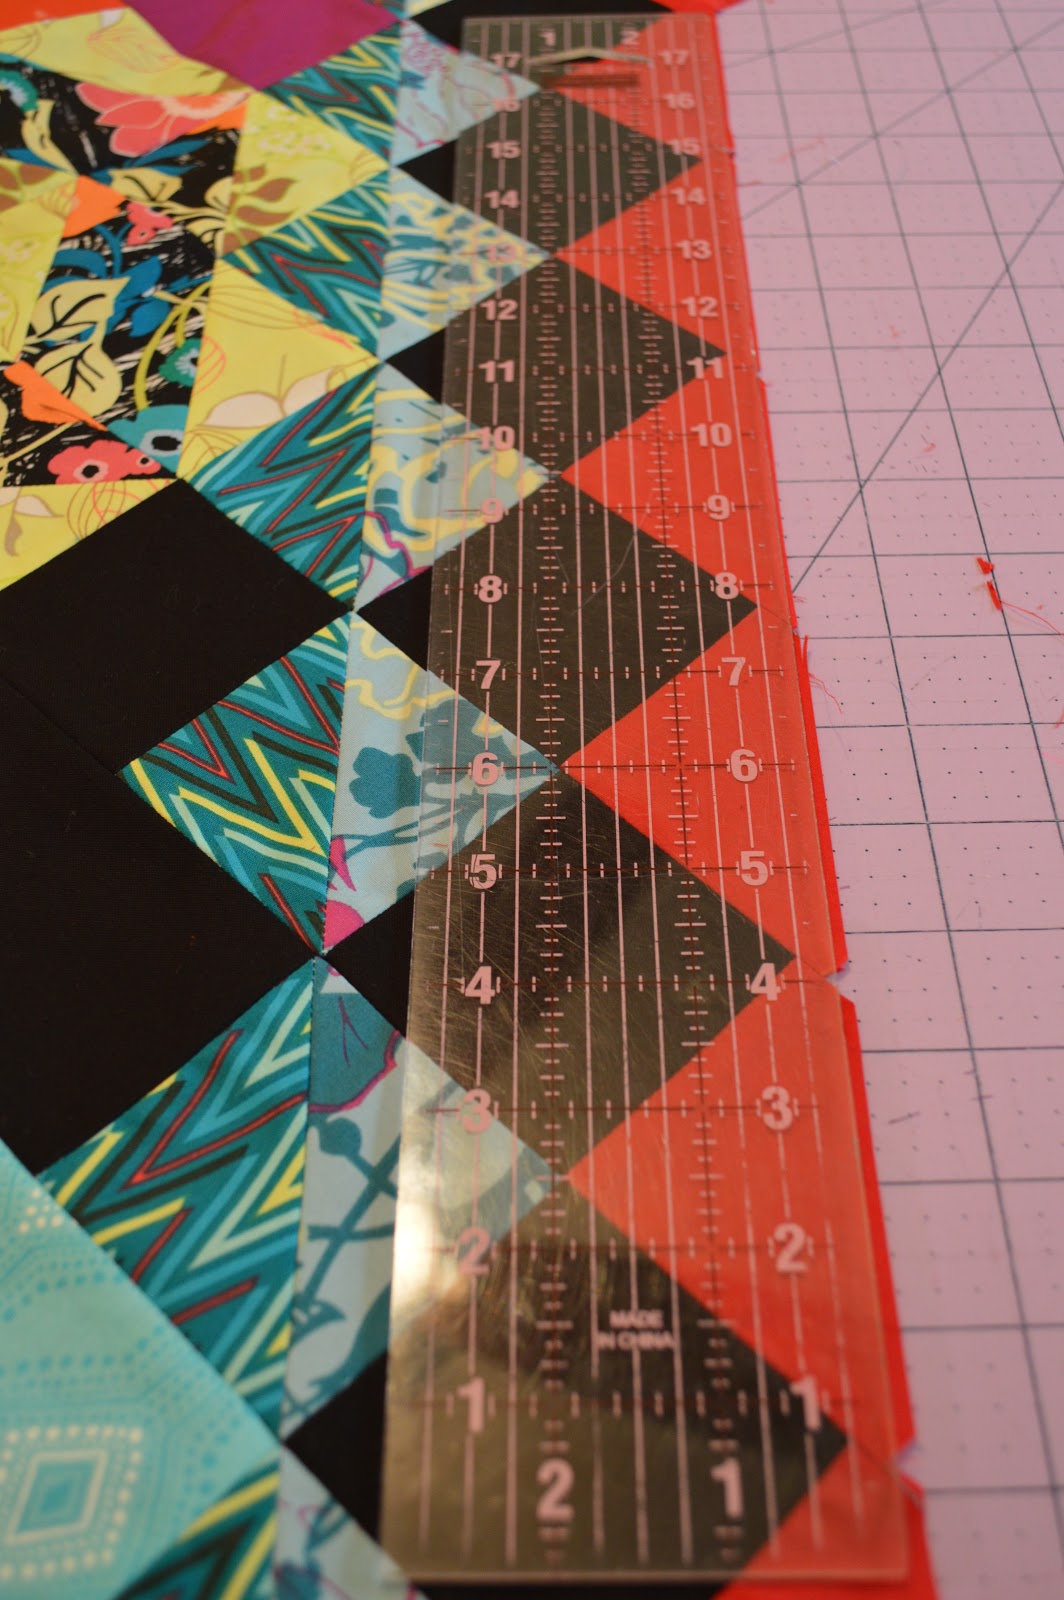
When you're all finished up, using a straight edge, trim away any excess fabric LEAVING a 1/4 of an inch.

Sew the white top and bottom strips first.
Last attach the side panels.
You will need to trim excess white fabric at the very end off your side panels.
It may sound strange, but I love when extra fabric hangs.
Just in case my quilt, "shifted" during stitching, the excess fabric allows me to straighten things out.
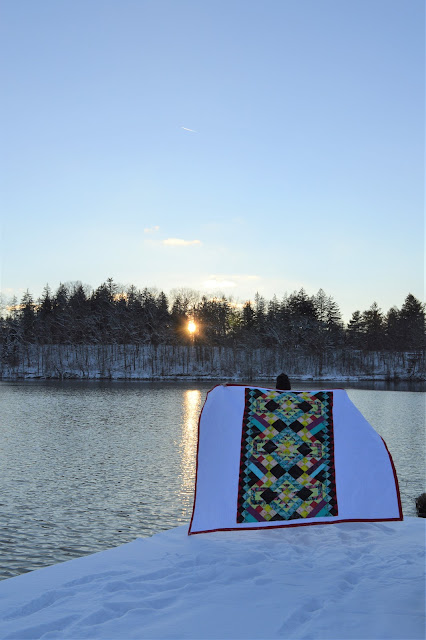
That's it! Your quilt top is all done and ready for batting!


Wishing everyone a very Merry Xmas and bright and shiny New Year!

Sew the white top and bottom strips first.
Last attach the side panels.
You will need to trim excess white fabric at the very end off your side panels.
It may sound strange, but I love when extra fabric hangs.
Just in case my quilt, "shifted" during stitching, the excess fabric allows me to straighten things out.
That's it! Your quilt top is all done and ready for batting!


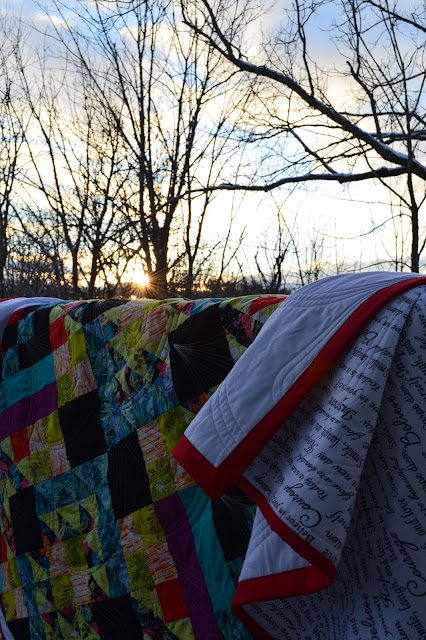
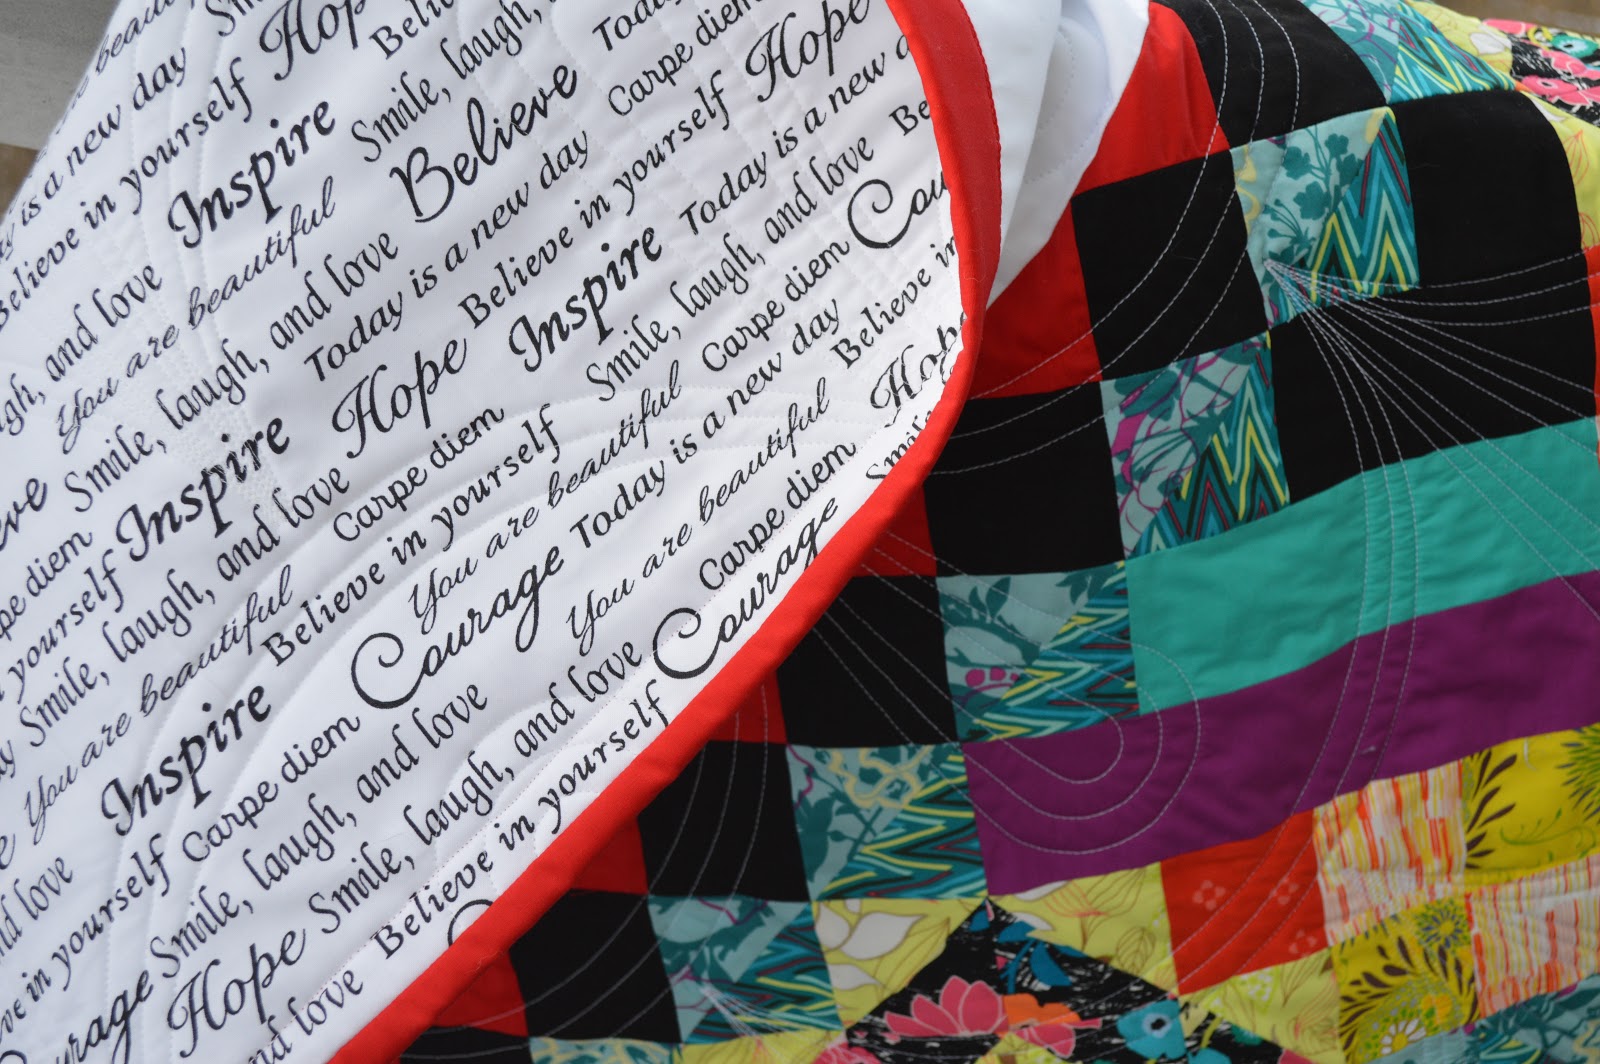
And that backing? Sew Hope Full is packed with positive words. It's just the perfect thing to wrap around your body and snuggle with.
This truly is a fun project for using up scraps!


Wishing everyone a very Merry Xmas and bright and shiny New Year!
Love the colours in your quilt! And what amazing outdoor pics in the snow!
ReplyDeleteThanks so much! I absolutely love the way this one turned out:)
Delete