
Stinging Nettle & Yellow Dock Soup


One of our favorite family soups: Stinging Nettle and Yellow Dock

This deliciously simple and delicate soup is a wonderful way to grab so many important nutrients.


Yellow Dock, a powerful, perennial herb, is known for clearing out bacterial and fungal infections in the body. It has great anti-inflammatory agents,
that can help combat arthritis, dermatitis, rashes, and psoriasis.
 It can be used in salads, soups, and teas.


Stinging Nettle might sound a bit tougher. Packed in Vitamins A, B, C, and K, it also has many minerals important to sustaining good health. Inflammation, cancer, allergies, enlarged prostate, and elevated blood sugar are all fought when we consume Stinging Nettle. 


Stinging Nettle has a very sharp burn if you touch it with your hands. Yes, you will feel it for hours. That's why I always snip mine using rubber gloves and little trimmers.  And.... while my rubber gloves are still on, my herbs will be washed thoroughly and set aside for the recipe!


The Recipe

~ 1 large handful of yellow dock
~ a medium bowl full of stinging nettle (roughly 4-6 cups)
~ 1 32oz of organic broth (bone, vegetable, beef, or chicken)
~ salt and pepper to taste
~ a deep 12.5" pan, filled half way with water


In a 3 or 4 quart sauce pan, warm up the broth of choice on low heat. (I love to use bone broth for this recipe.) Use a bigger pot if you plan on adding water to your broth for a less concentrated soup.


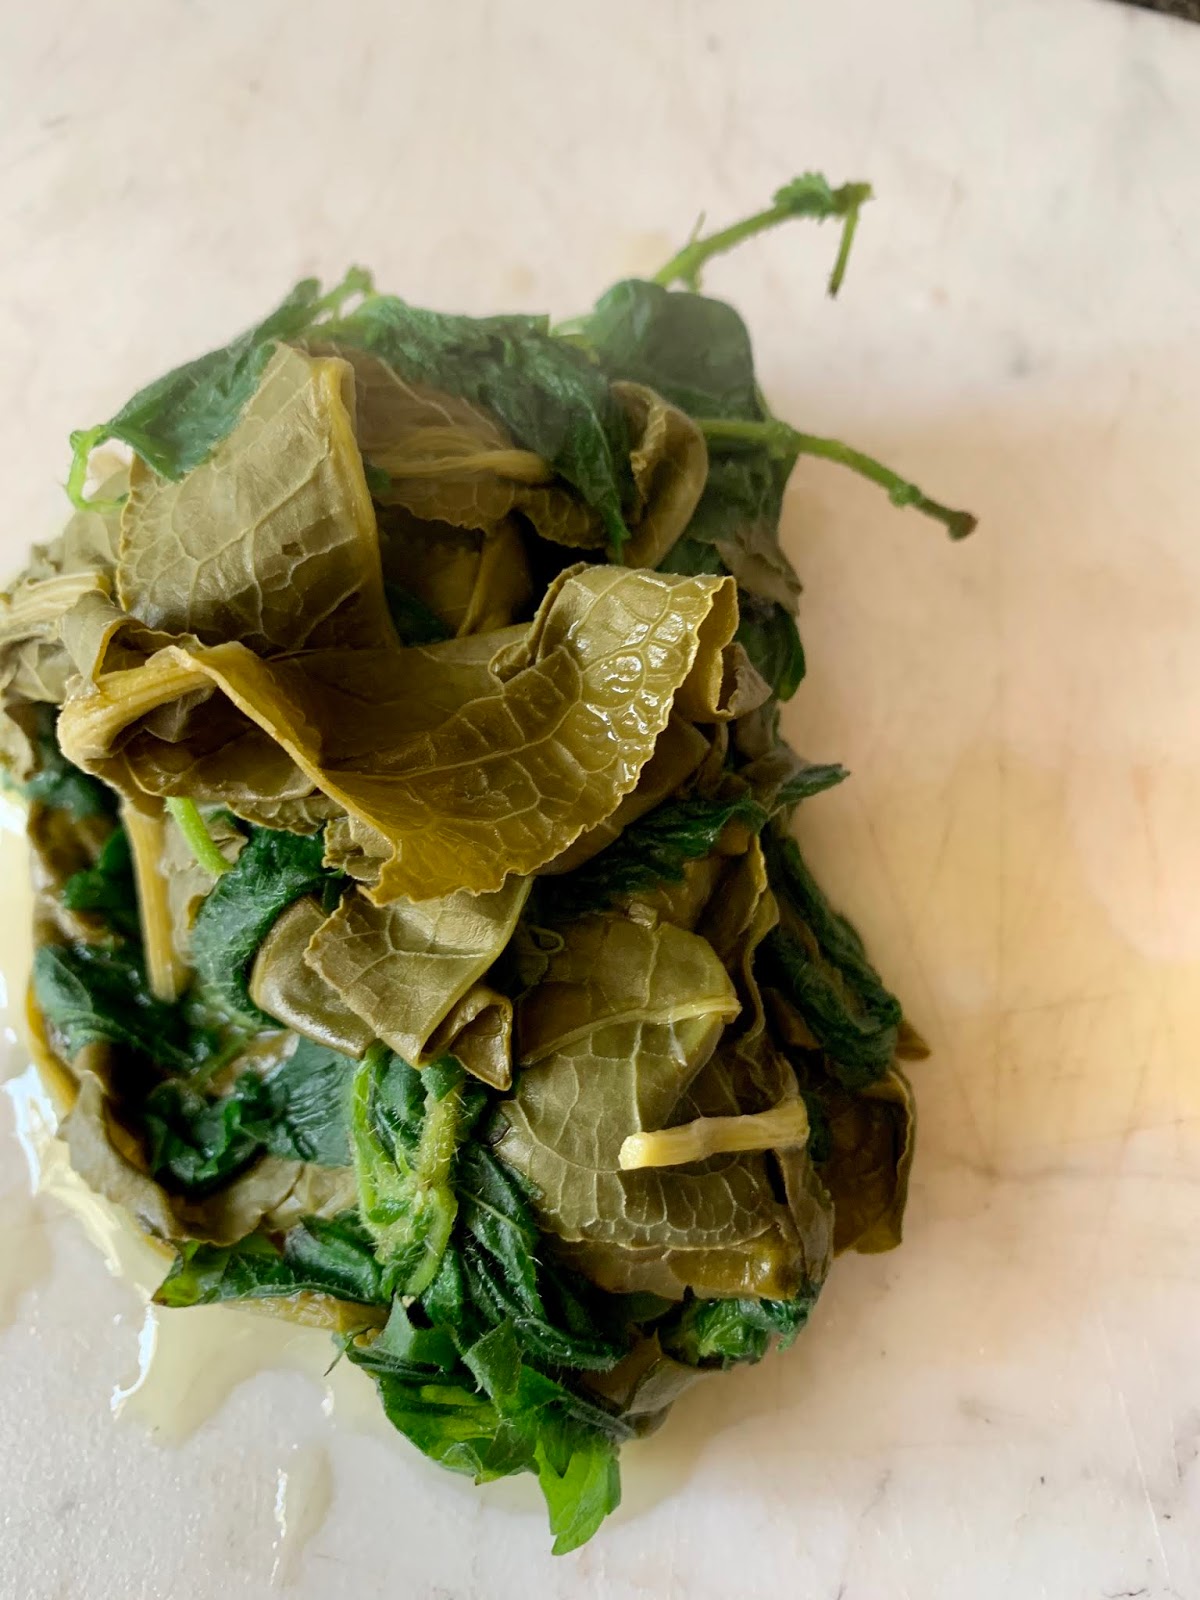
Bring the water in the deep 12.5" pan to a boil. Add the dock and nettle.


As it wilts, the color of the leaves will begin to vary. 
This will only take a few minutes.


Remove the wilted leaves and place them on a cutting board.


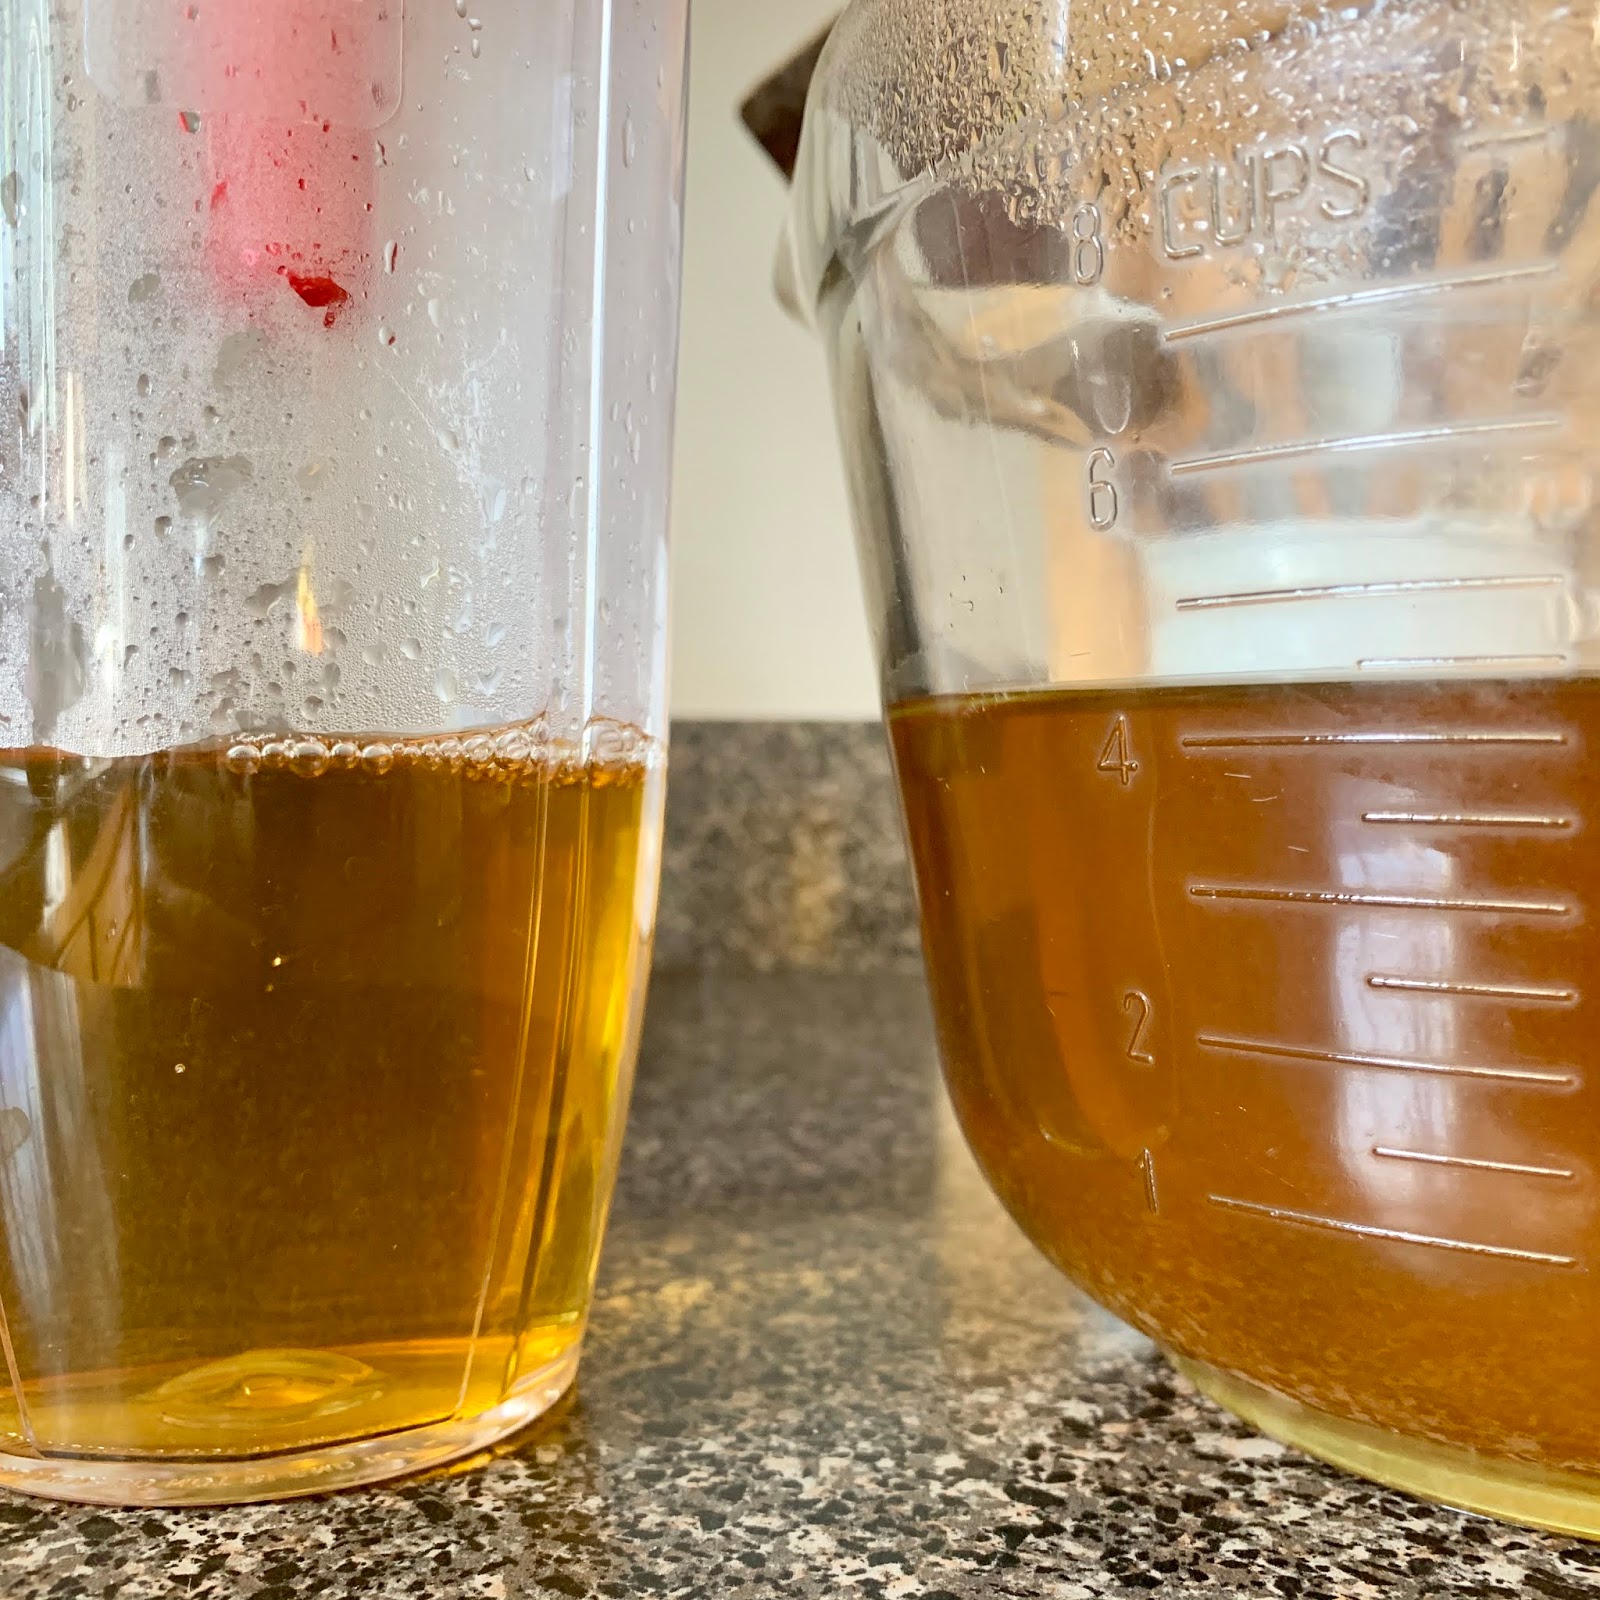
Don't throw away the boiled herb water!


~Double duty moment~

Filter the herb water through a strainer and coffee filter.
Below, on the left is the filtered herb water.
You can see how much more clear it is than on the right.
Use this for a hair rinse if you have breakage or dry scalp. I set it aside for my daughter who has dandruff. It works great!


Going back to the soup, chop up your wilted herbs and place them into your broth pot. Salt and pepper to taste, since the broth may already contain sodium.


Cook your soup for an additional 10-15 minutes on a low heat. 
You can add parsley, rosemary, and dill for extra flavors. 

You will get 5 servings from this soup.


I love to add fresh nettle to the bottom of my serving bowls.
As the hot soup is poured over, the leaves will wilt and become a tasty treat at the end!


I hope you enjoy this simple and powerful recipe. 
I love to cook this in the Spring when we are enjoying all the new green growth after winter and as a way to say goodbye in the Autumn and get our bodies ready to handle the cold and flu season ahead.


Happy Trails till next time!

Comments

Popular posts from this blog

Crystal Knob Rack

So... what can you do with a piece of wood measuring 45 inches by 3 1/2? Well, if it's 1 inch thick, you can use it to make the cutest wall rack. But instead of using hooks, use drawer knobs!   Here's how the idea got started. I needed a place to photograph kids aprons. Now, most of you know that my girls have been modeling them, but they can't model toddler aprons, right? All I could picture was a gorgeous crystal knob rack used to display those mini aprons I love to make. And after searching in stores and online, I realized they are not very easy to find. Soo...... "oooohhh hubby.... can you drill a few holes in this piece of oak wood I found in the barn?"   Of course he did it in a heart beat & he even sanded it down too! The holes were positioned like this: I did the two outer ones first, then measured to the center in between those. And again, the middle of the center and outer one. Got it? I took some regular creamy white wall paint I had left

The Ogden Cami ~ A Review

Hello friends! I hope you all had a wonderful February and a great start to March! Spring is right around the corner and I'm counting down to daylight savings on March 10th! Hooray for longer sunshine! Lately, I've been longing to go back to stitching up clothes. And... I ended up finding the cutest pattern to get me back in the groove at Hawthorne Threads . The Ogden Cami by True Bias Patterns is perfect and quite simple! I started off by making a test run with some red, light-weight fabric, figuring if this comes out good, I'll have 2 tops! And guess what? It came out awesome! Making a practice piece was a great idea. It's always recommended and there are so many reasons why. In the instructional booklet, I wrote myself little notes.  ~ cut the fabric 1/4" larger at the sides so I can use a serger. This will allow me to have finished ends and still a good seam allowance.  ~ cut the straps 1/2" larger, so the

January.... you're almost done!

Hello friends!  I feel like it's been forever since my last post. I suppose some might even say I've been spending nearly all my time on the forefront of creative madness along with trying to continue healing. Holy smokes! Chemo and radiation will change a person forever. I'm continuing my healing journey, and staying hopeful that I'll remain in the 'clear' for a long time. It's odd, the way you feel, when everything you've gotten accustomed to: the running around, working day to day, rushing here and rushing there.... how quickly it changes when it's no longer a necessity. Yes, I am extremely thankful that my spouse supports and pushes for my healing time, omitting nurse life as it was, but like I told my girlfriend the other day, "how many craft projects can a girl possibly do?" ..... Well let me just tell you..... A LOT! Today's post will revisit some Instagram pics, (in case you don't follow along) with some of my most recent