
The Felix Quilt


It's here and it's been here, but this blog hasn't seen the details surrounding The Felix Quilt until today. 

What started off as some late night doodling earlier in the year, turned into one of my FAVORITE projects ever. But not all happened as I would've liked. The truth? For starters, the quilt top didn't get quilted on time. (And I really really wanted a completed top for the pattern cover.) Second, pattern testing seemed discouraging as a handful of testers opted out. Which makes me so extremely THANKFUL for the AWESOME ladies that stuck by my side and really pushed this project along. They are truly amazing & gave me wonderful insight!

Jennifer Phillips
Quilt & Clay
Lavender Lamb Gifts
Paperclip Quilter

The intermediate pattern, consists of 2 sixteen block quilts that go step by step to show you how to create the quilt. In short, it's one block that gets flipped in the rows to create the design. Bonus patterns are also included. One is for an eight block quilt and the other, a 4 block table runner. Soft ovals packed with geometric shapes become the perfect playground for color schemes and contrast.

 Why go step by step if it's just one block?
Simply put, it's all about the measurements and keeping the sections of the block organized. 
(7/8" vs 1") - So....Instead of jumbling all the cutting right off the bat, I figured step by step would be extremely organized and move more quickly. And ya know what? It was. With feedback from testers, I realized I made the right choice - but labeled it an intermediate pattern because of how many steps there are.

Take a look at these pics!


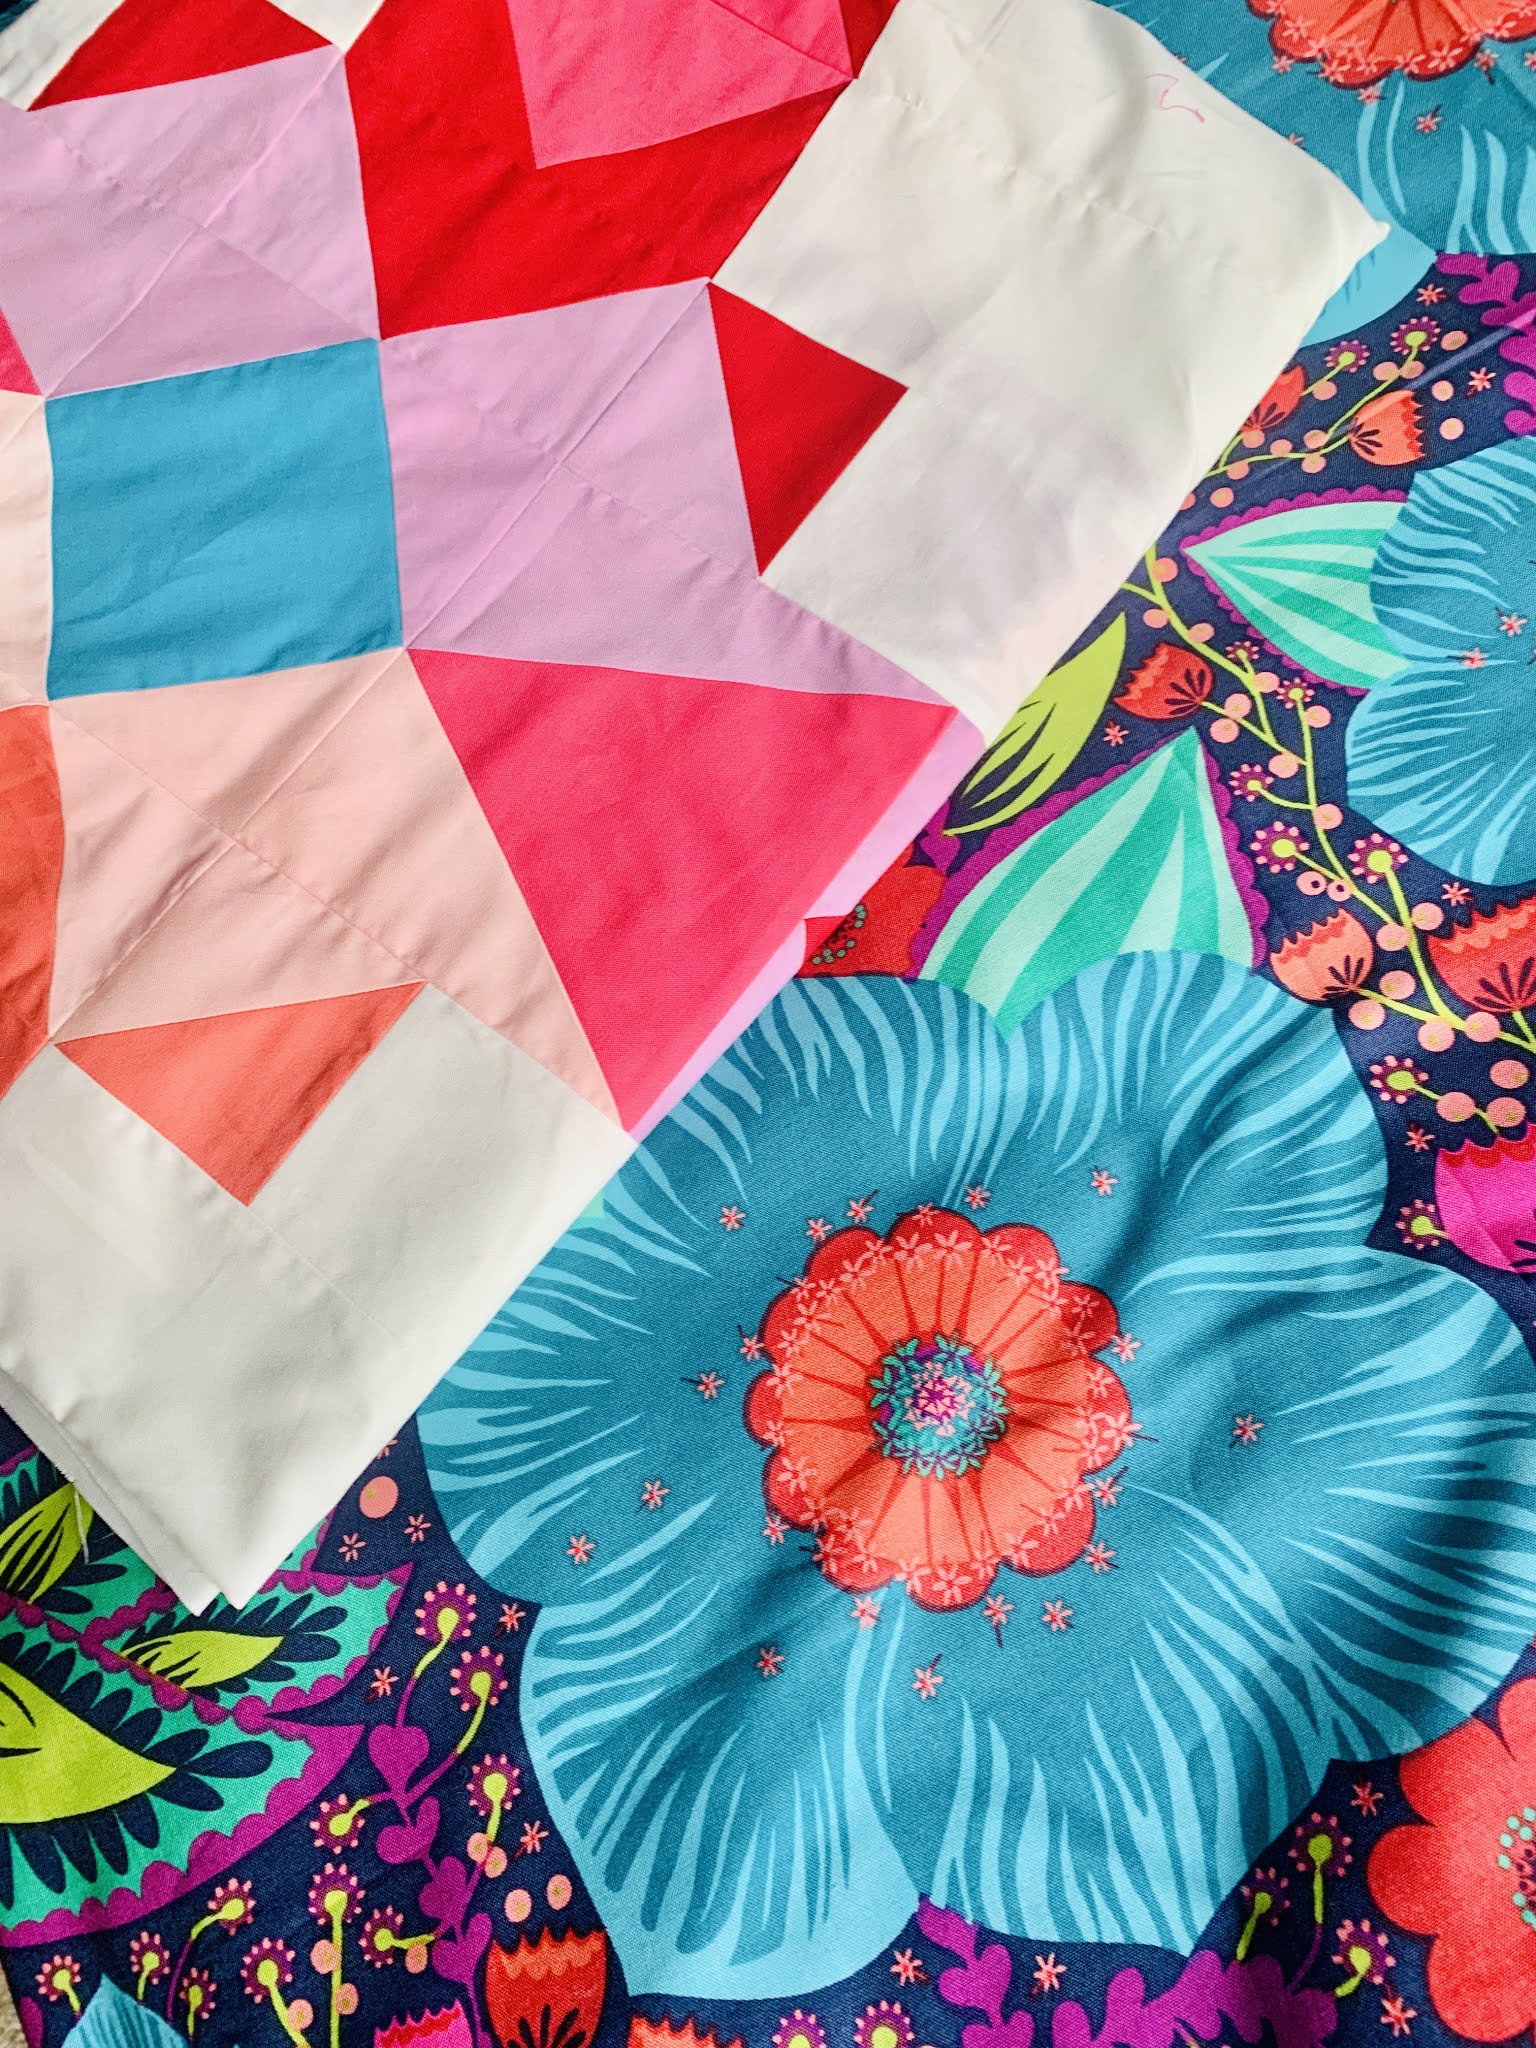
This is the second quilt I’ve completed on my Gracie longarm frame. I opted for wavy stitches and a dense look after reviewing images I've saved on Pinterest. I love it so very much!

If you decide to stitch up a Felix Quilt for yourself, I'd love to hear feedback! If you're on Instagram, don't forget to use the hashtags, themintneedle & felixquilt!


Happy Trails to working with the things we love!


Comments

Popular posts from this blog

Crystal Knob Rack

So... what can you do with a piece of wood measuring 45 inches by 3 1/2? Well, if it's 1 inch thick, you can use it to make the cutest wall rack. But instead of using hooks, use drawer knobs!   Here's how the idea got started. I needed a place to photograph kids aprons. Now, most of you know that my girls have been modeling them, but they can't model toddler aprons, right? All I could picture was a gorgeous crystal knob rack used to display those mini aprons I love to make. And after searching in stores and online, I realized they are not very easy to find. Soo...... "oooohhh hubby.... can you drill a few holes in this piece of oak wood I found in the barn?"   Of course he did it in a heart beat & he even sanded it down too! The holes were positioned like this: I did the two outer ones first, then measured to the center in between those. And again, the middle of the center and outer one. Got it? I took some regular creamy white wall paint I had left

The Ogden Cami ~ A Review

Hello friends! I hope you all had a wonderful February and a great start to March! Spring is right around the corner and I'm counting down to daylight savings on March 10th! Hooray for longer sunshine! Lately, I've been longing to go back to stitching up clothes. And... I ended up finding the cutest pattern to get me back in the groove at Hawthorne Threads . The Ogden Cami by True Bias Patterns is perfect and quite simple! I started off by making a test run with some red, light-weight fabric, figuring if this comes out good, I'll have 2 tops! And guess what? It came out awesome! Making a practice piece was a great idea. It's always recommended and there are so many reasons why. In the instructional booklet, I wrote myself little notes.  ~ cut the fabric 1/4" larger at the sides so I can use a serger. This will allow me to have finished ends and still a good seam allowance.  ~ cut the straps 1/2" larger, so the

January.... you're almost done!

Hello friends!  I feel like it's been forever since my last post. I suppose some might even say I've been spending nearly all my time on the forefront of creative madness along with trying to continue healing. Holy smokes! Chemo and radiation will change a person forever. I'm continuing my healing journey, and staying hopeful that I'll remain in the 'clear' for a long time. It's odd, the way you feel, when everything you've gotten accustomed to: the running around, working day to day, rushing here and rushing there.... how quickly it changes when it's no longer a necessity. Yes, I am extremely thankful that my spouse supports and pushes for my healing time, omitting nurse life as it was, but like I told my girlfriend the other day, "how many craft projects can a girl possibly do?" ..... Well let me just tell you..... A LOT! Today's post will revisit some Instagram pics, (in case you don't follow along) with some of my most recent