
Fabric Buckets


As I'm looking at the scattered fabric squares and triangles on the playroom floor, I can't help but noticed that teddy bears and stuffed animals are decorating the base boards of the room. I attempt to make a fast clean up, quickly noticing all the bins are maxed out. So instead of instigating an impromptu clean up with the girls... this crafty mom finds the positive and starts another project. Yup, that's what happens to those of us who like to create. Sometimes I think I'm the only person that can see a mess and even that will spark a new idea! 


Fabric bins are great for so many reasons. They're washable, great for matching decor, you can use them from the closet to toys.... etc. etc. etc. You get the picture. Right? BUT.... I could never seem to find the perfect size. I really wasn't in the mood for running to the store to find a pattern and online sites... well....the fabric buckets are just to small. So, first I decided square bottom or circular? Circular seemed more easy. I ran to the kitchen and grabbed a huge chip & salsa wooden bowl.


Next I measured the circumference and made note to cut my fabric THAT length. Yes... THAT length. The reason. It's easier to cheat the base of the bucket rather than the noticeable side should you fall short with fabric length. I added seam allowance to mine and ended up snipping away while the base was getting stitched on. Ugh...

Going on... You'll need 3 parts each to the base & sides: outer fabric, inner fabric, & lining. Remember to ask yourself how tall do you want your bin to be? In the end you'll fold over the edge so add a generous inch and a half to the desired height!


Starting with base, I stitched my inner fabric to the batting I used as my lining.


Stitch the vertical part of the bin by matching right sides together and doing a half inch seam. I know it sounds crazy considering you didn't cut a seam allowance but, again, I did, and I needed to snip away a whole inch! 


Attach the base to the sides with many many many pins.

If you added seam allowance to your fabric anyways:
Start by stitching an inch away from the vertical seam.
By the time you make it full circle, you will be able to gauge if you need to snip away.


I added the side batting to the outer fabric because I wanted a couple horizontal quilt lines.
I added quilting to the base in the previous pictures to avoid bulking.


It's looking like a bin!


Attach the inside to the out and straight stitch the top.


Last, I folded over the top to create a contrasting line and some sturdiness to the edge.
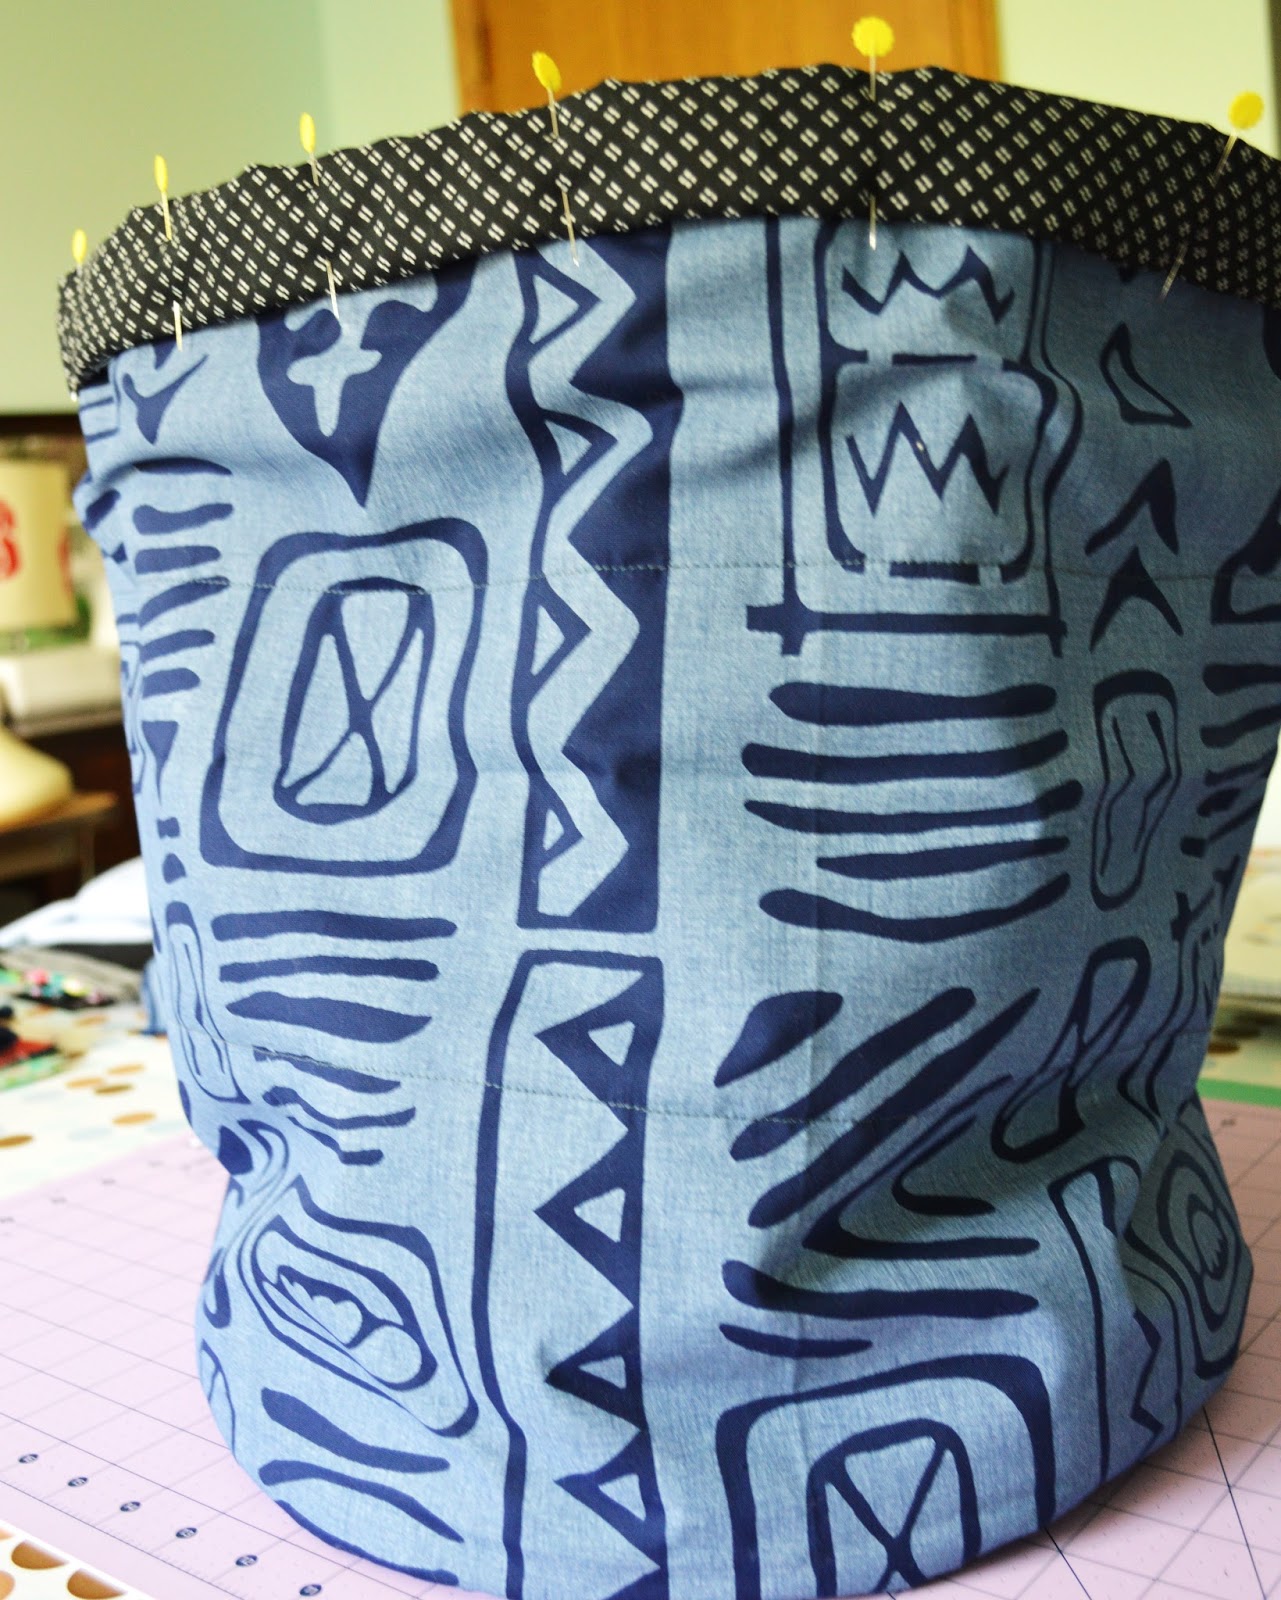

And it's done!!!


The finished size is a little over 15 inches tall by a 13 inch base.


Happy Trails to the things that spark new ideas! Now, time to get back to those fabric pieces!

Comments

Popular posts from this blog

What is musmula?

Look at these beauties. Finally, I find an answer to this question! The translation for the Turkish, Mediterranean fruit called 'musmula' is 'medlar'.  This exotic fruit that's a cross between a pear and a hawthorn is very unique and tasty. I owe great thanks to my grandfather for grafting this beauty in my yard. Sadly, I don't have any recipes regarding the medlar. But I have read that it is great for making preserves and jelly's. This is a tasty fall fruit that can only ripen after the first frost. I should really move them to a dry shelf until the pulp softens. Then, they're the best!

The Ogden Cami ~ A Review

Hello friends! I hope you all had a wonderful February and a great start to March! Spring is right around the corner and I'm counting down to daylight savings on March 10th! Hooray for longer sunshine! Lately, I've been longing to go back to stitching up clothes. And... I ended up finding the cutest pattern to get me back in the groove at Hawthorne Threads . The Ogden Cami by True Bias Patterns is perfect and quite simple! I started off by making a test run with some red, light-weight fabric, figuring if this comes out good, I'll have 2 tops! And guess what? It came out awesome! Making a practice piece was a great idea. It's always recommended and there are so many reasons why. In the instructional booklet, I wrote myself little notes.  ~ cut the fabric 1/4" larger at the sides so I can use a serger. This will allow me to have finished ends and still a good seam allowance.  ~ cut the straps 1/2" larger, so the ...

Flying Geese ~ Etno Style

The fabric, the quality, the colors..... I couldn't wait to get my hands on the Etno Fabric Collection  by Pat Bravo!! The colors & shapes are always so inspiring. And as I was working on this project, new ideas were getting sparked. (So..... you're going to be checking out two more pieces I've been working on.) One thing is for sure. These gorgeous prints needed to be center of attention and what better way than with City Stitches Follow the Leader Quilt! All you can focus on is the way the colors play and blend together. The flying geese were made using the "no waste method". The large square (main fabric) measured 9-1/4" by 9-1/4" while the four small (white) squares were 4-7/8" by 4-7/8". This left me with four flying geese per one fabric pattern that measured 4" by 8".   I love the way this piece came out so much!  The fourth row of flying geese from the no waste method we...